
In CloudStream 3.0, some features are served by the standard EveryonePrint Mobile Print product. Ultimately all major features from the EveryonePrint Mobile Print will be integrated into CloudStream directly, but until then, this section outlines the configuration necessary to integrate the “legacy” Ricoh into CloudStream.
Added Features
Combining CloudStream with EveryonePrint Mobile Print for CloudStream include the following additional features:
-
Printing from mobile devices via Web upload and Email print
-
Create guest users in CloudStream from within the Ricoh Web interface
-
Ricoh creates a unique numeric username and password for the guest
-
User accounts are created as internal RICOH CloudStream users
-
Users email address set in RICOH CloudStream
-
Login credentials optionally emailed to user
-
-
Automatically create guest user in CloudStream when user sends email print job
-
Ricoh creates a unique numeric username and password for the guest
-
User accounts are created as internal RICOH CloudStream users
-
Users email address set in RICOH CloudStream
-
Login credentials emailed to user
-
-
Ability to automatically delete created guest user accounts in CloudStream after a pre-defined time period
Prerequisites and Requirements
-
RICOH CloudStream must be minimum version 2.1 and EveryonePrint Mobile Print for CloudStream must be minimum version 4.2.6.
-
EveryonePrint Mobile Print can run either on Windows or on Linux.
-
An EveryonePrint Mobile Print installation is required for each account in CloudStream (EveryonePrint Mobile Print is not multi-tenant)
-
Root access for installation
-
The following libraries/tools are required:
-
CUPS
-
CURL
-
Fontconfig
-
FreeType
-
rsync
-
**bzip2
-
Relevant firewall ports should be opened. See Ports and Protocols, section Web Administration UI.
-
An API key with full API access needs to be generated in CloudStream to use in Ricoh Mobile for CloudStream > User Authentication
Install EveryonePrint Mobile Print for CloudStream
Install dependencies
Prior to installing Ricoh, install the required dependencies using either yum or zypper, ie
yum install cups curl fontconfig freetype rsync bzip2
Install Ricoh
Download EveryonePrint Mobile Print for CloudStream from the RICOH CloudStream Support site, and upload to the secondary server where it should be installed, or download directly on the secondary server:
xxxxx is the version number for the latest Ricoh Mobile for CloudStream
wget https://cdn.everyoneprint.com/everyoneprint-for-CloudStream-xxxxxxx.tar.bz2
Next extract the compressed file.
tar -xjf everyoneprint-for-CloudStream-xxxxxx.tar.bz2
Next, change to the Ricoh directory and run the install script.
cd everyoneprint/
./install.sh
The installer script will check for dependencies, create a user and copy files to /opt/everyoneprint. During the installer script, the license agreement is shown. Enter “yes” to accept and continue.
Configuring RICOH CloudStream features in Ricoh
The following section covers the configuration screens in Ricoh Admin.
http://server-address:7290/admin
Configure Authentication
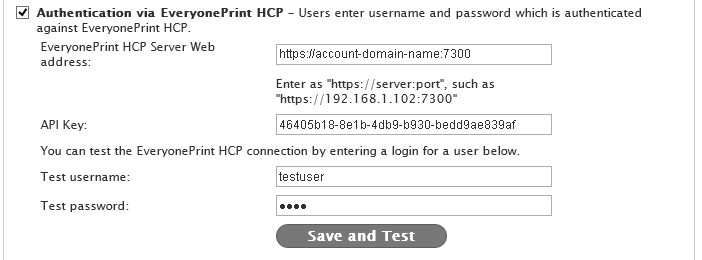
First, configure User Authentication against RICOH CloudStream:
-
Replace account-server-domain with the account domain name of the CloudStream account to which this Ricoh should be connected.
-
Generate an API key with full API access in CloudStream for use with EveryonePrint Mobile Print for CloudStream
-
Report the API key in “User Authentication” > “Authentication via RICOH CloudStream” >“API key”
-
Verify the authentication to RICOH CloudStream using a username or password of a test user created in RICOH CloudStream.
If test authentication fails, an error message will be shown, and error details written to the Ricoh log files.
Add Devices
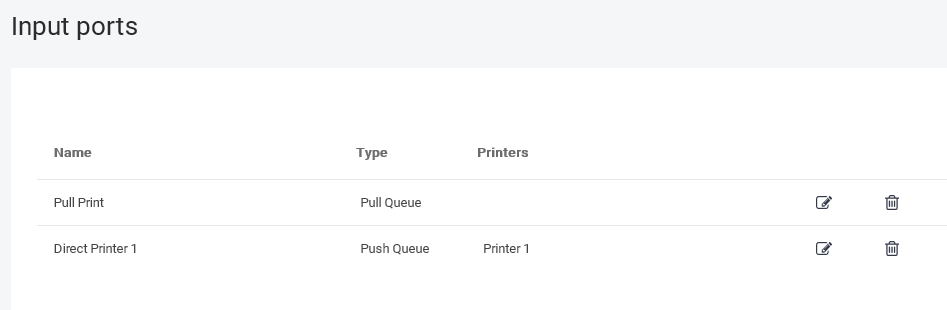
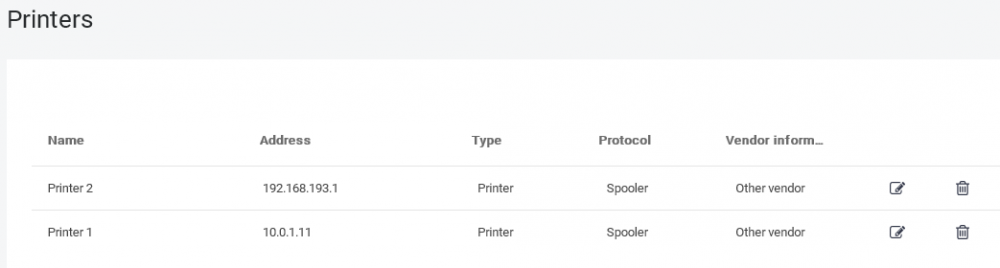
Go to Admin -> Devices and add the print queues.
Queues in the list starting with eophcp:// are the input and output ports of the CloudStream account. Add the input ports for sending jobs from Ricoh legacy to CloudStream, and add output ports for releasing jobs using the Ricoh Apps with or without QR codes.

Automatically create accounts for email print
Under Email Authentication, choose how email from unknown senders should be handled, whether unknown senders are guests, and accounts should be created in RICOH CloudStream automatically for guests.
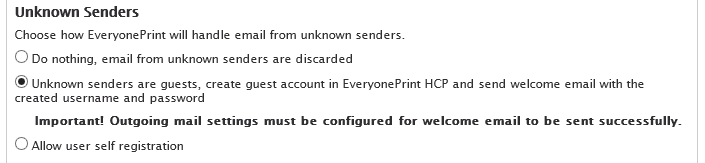
In this configuration an account is created in RICOH CloudStream for unknown users.
RICOH CloudStream Guest User self-sign up via the Web
If Ricoh is installed in an environment where guests should be able to create guest accounts using a Web interface, enable the RICOH CloudStream Guest Users Self-Signup feature.
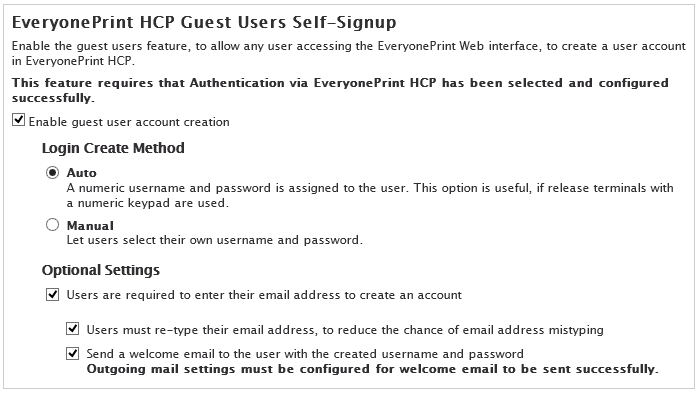
Users created via the Web portal are created in the internal RICOH CloudStream users database. If an Active Directory exists, both LDAP and RICOH CloudStream users can authenticate.
Automatically delete created guest user accounts
To automatically delete created guest user accounts, specify under User Authentication the time period in minutes after which accounts are deleted. Set to 0 to never automatically delete guest user accounts.
Troubleshooting tips
Create a test accounts using Web form
Even if the feature is not needed, it’s recommended to test the account creation in RICOH CloudStream, using the Web based self-sign-up feature, outlined in section 4.2.2, as errors will appear and be written to log immediately.
Once accounts can be created successfully using the Web form, they can also be created from email.