
This guide outlines the steps required to migrate your Single Sign-On (SSO) and authentication provider configurations to port 443.
Version 3.48 introduces the use of Port 443 extensively simplifying the communication SAFEQ Cloud client endpoints. The enhancement may however cause authentication issues in specific customer scenarios. Affected customers should take immediate action by following the steps below to avoid disruption.
The following scenarios are affected:
-
Customers with Entra ID SAML Single Sign On
-
Customers using SAFEQ Cloud OAuth2
-
New or full re-installation of the PC Client
-
Web Admin UI authentication without the explicit use of port 8443
Scenarios NOT affected:
-
PC Client Upgrades will retain it's configuration and will not experience authentication issues
-
Customers who use PingID and Okta are not affected
Affected client behavior: Failure to authenticate on Web Admin UI and PC Clients with message "Application with identifier 'https:<your tenant url>:443/' was not found in the directory..."
-
If you need the authentication working via both the 8443 port and the 443 port, do not update your existing Redirect URLs. Just add a new HTTPS URL without the port specified to the list of Redirect URLs for your authentication provider. The result will be that in the values for the Redirect URL, you will have two records for each callback - one with the old port e.g.:
https://<domain>:8443/<callback>and one without port number:https://<domain>/<callback>. -
If you wish to only use port 443, update your existing Redirect URLs by removing port 8443.
We do not recommend using Redirect URLs with an explicitly specified port 443, as some authentication providers may check for the presence of this port, and most web browsers omit this standard HTTPS port after accessing a web address.
Follow the below instructions per authentication provider to reconfigure SSO using port 443.
Microsoft Entra ID
OAuth 2.0 and OIDC configuration
The general process for migrating Microsoft Entra ID configurations for OAuth 2.0 and OpenID Connect (OIDC), as well as the creation of applications in Azure, is similar, as both protocols are built on the same foundation. For more details, see Add a custom app in Microsoft Entra ID and Microsoft Entra authentication.
-
Log in to Microsoft Entra Admin Center as an administrator.
-
Navigate to App registrations. Find and select the application you wish to update.
-
Click Authentication Settings. In your app registration overview, click Authentication in the left menu.
-
In the Redirect URIs section, scroll down to Redirect URIs.
-
Update the Redirect URI. You’ll see a list of current Redirect URIs that are configured to handle authentication responses.
-
Locate URIs that reference port 8443 and depending on your use case, either remove the 8443 port, or add a new URI record as follows:
https://<domain>/<callback>. -
The domain should be the same as the one of the SAFEQ Cloud Web UI URL. For example, if your SAFEQ Cloud Web UI URL is
,the new value should be:
-
-
Save and test your changes.
SAML configuration
To migrate SAML Single Sign-On configuration in Microsoft Entra ID, perform the following steps. For more details about Microsoft Entra, see Microsoft Entra Single Sign-On.
-
Log in to Microsoft Entra Admin Center as an administrator.
-
Go to Enterprise applications > All applications. Find and select the application you wish to update. You can use the search bar to find and select the application for which you need to update the SAML SSO settings.
-
Go to the Single Sign-On Settings. Within your selected application, click Single sign-on in the left menu. This will open the SAML-based SSO configuration page.
-
Update the Identifier (Entity ID): https://<domain_name_that_has_saml_configured>/. Change SSO issuer ID optional parameter in Single sign-on authentication settings in your account to match this value if it is filled in.
SAFEQ Cloud Client with OAuth2 login will use a port based on connection to SAFEQ Cloud, i.e. either 8443 or standard HTTPS port 443. To make both ports work, you can either:
-
have two URIs in Entity ID, one without port specified, i.e.
https://[domain_name_that_has_saml_configured]/and with port 8443https://[domain_name_that_has_saml_configured]:8443/ -
or specify SSO issuer ID optional parameter in Single sign-on authentication settings in your account to match URI specified in Entity ID, e.g.
https://[domain_name_that_has_saml_configured]/
-
-
Update the Sign-On URL:
https://<domain_name_that_has_saml_configured>/assertion/saml -
Update the Reply URL :
https://<domain_name_that_has_saml_configured>/assertion/saml -
Save and test your changes.
Troubleshooting
OAuth2 authentication stops working in SAFEQ Cloud Client when used with Single sign-on: "Sorry, but we're having trouble signing you in."
Message from Microsoft, saying "Application with identifier 'https://[domain_name]/' was not found in the directory...":
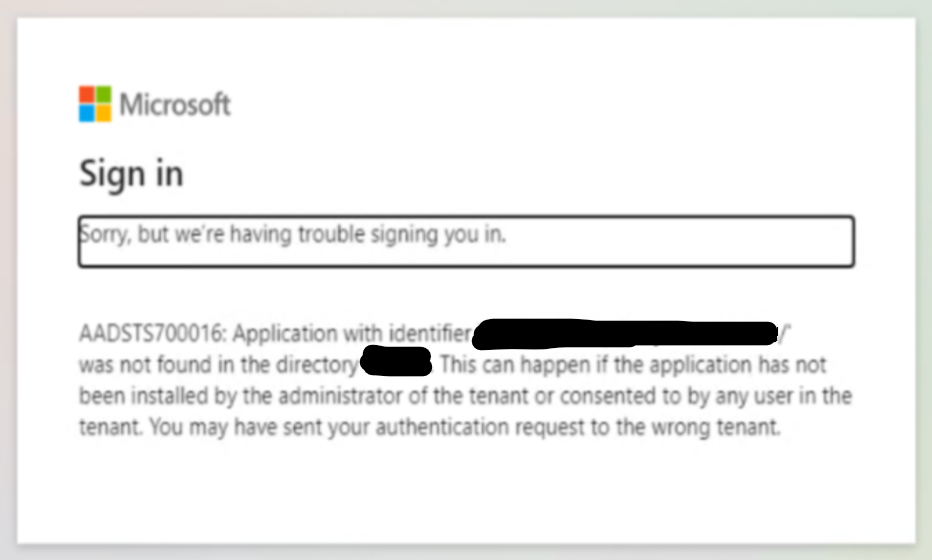
This can be caused by SAFEQ Cloud Client opening an authentication page with a different port than expected by the Microsoft Entra ID application for SAML SSO.
To fix this, you can either:
update Microsoft Entra ID application for SAML SSO:
-
Navigate to Microsoft Entra Admin Center in your web browser and sign in with your administrator credentials.
-
Select Enterprise applications and then select All applications. Find and select the application you wish to update. You can use the search bar to find and select the application for which you need to update the SAML SSO settings.
-
Access Single Sign-On Settings. Within your selected application, click on Single sign-on in the left-hand menu. This will open the SAML-based SSO configuration page.
-
In Identifier (Entity ID), depending on your use case, either remove port 8443 from the URI, or add a new record as follows:
https://<domain_name_that_has_saml_configured>/. -
If you added a record, you will now have two URIs in Entity ID – one without the port specified (i.e.
https://<domain_name_that_has_saml_configured>/and one with port specified, i.e,https://<domain_name_that_has_saml_configured>:8443/). -
Save and test your changes.
or update Single sign-on authentication settings in your account:
-
Log in to SAFEQ Cloud Web UI.
-
Navigate to Authentication > Single sign-on.
-
Specify the optional parameter SSO issuer ID to match the URI specified in Entity ID in your Microsoft Entra ID application for SAML SSO (e.g.
https://<domain_name_that_has_saml_configured>/). -
Save and test your changes.
OAuth2 authentication stops working in SAFEQ Cloud Client when used with Microsoft Entra ID Customizable authentication: "Sorry, but we're having trouble signing you in."
Message from Microsoft, saying "The redirect URI 'https://[domain_name]/callback/oidc-login' specified in the request does not match the redirect URIs configured for the application...":
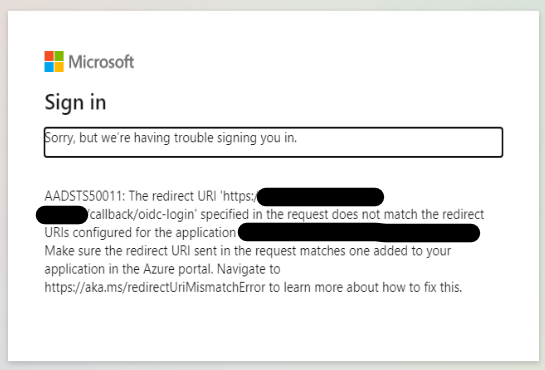
This can be caused by SAFEQ Cloud Client opening the authentication page with a different port than the Microsoft Entra ID application for OIDC expects.
To fix this, update the Microsoft Entra ID application for OIDC:
-
Navigate to Microsoft Entra Admin Center in your web browser and sign in with your administrator credentials.
-
Navigate to App registrations. Find and select the application you use for OIDC in your authentication provider. You can search for it by name if needed.
-
Access Authentication Settings. In your app registration overview, click on "Authentication" in the left-hand menu.
-
Locate the Redirect URIs Section. Scroll down to the Redirect URIs section.
-
In Redirect URI, you’ll see a list of current Redirect URIs that are configured to handle authentication responses.
-
Depending on your use case, either remove the 8443 port from the URIs, or add new records as follows:
https://<account-domain>/callback/oidc-loginandhttps://<account-domain>/callback/acl(replace<account-domain>with other addresses you have configured for port 8443). -
If you added new records, you will now have 4 addresses in total (two with port 8443 and two without port specified).
-
Save and test your changes.
Okta
OIDC configuration
To migrate OIDC Okta to port 443, perform the following steps. For more details about Okta, see OKTA Authentication.
-
Log in to the Okta Admin Console as administrator.
-
Navigate to Applications. Find and select the application for which you need to update the redirect URLs.
-
In the application settings, go to the General tab and click Edit.
-
In the Sign-in redirect URIs section, depending on your use case, either remove the 8443 port number from the existing records, or add new URI records as follows:
https://<domain>/callback/oidc-loginandhttps://<domain>/callback/acl. -
Save and test your changes
SAML configuration
To migrate SAML Single Sign-On in Okta to port 443, perform the following steps. For more details about Okta, see Okta Single Sign-On / Logout.
-
Log in to the Okta Admin Console as administrator.
-
Navigate to Applications. Find and select the application for which you need to update the SAML SSO settings.
-
Locate the Single Sign-On URL and depending on your use case, either remove the 8443 port number from the existing URL or add a new URI value as follows:
https://<account-domain>/assertion/saml. -
Update the Audience URI (SP Entity ID). Change SSO issuer ID optional parameter in Single sign-on authentication settings in your account to match this value if it is filled in
-
Review and update any additional URLs, such as Logout URL, in case they contain port 8443.
-
Save and test your changes.
Troubleshooting
OAuth2 authentication stops working in HCP Client when used with Okta Customizable OIDC authentication
You get the following message from Okta saying: "The 'redirect_uri' parameter must be a Login redirect URI in the client app settings...":
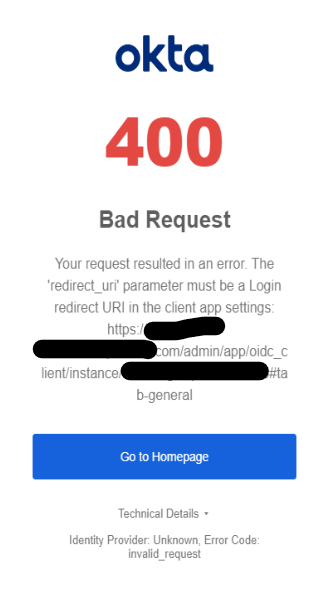
This can be caused by SAFEQ Cloud Client opening the authentication page with a different port than the Okta application for OIDC expects.
To fix this, update Okta application for OIDC:
-
Access the Okta Admin Console and log in with your administrator credentials.
-
Navigate to Applications, find and select the application for which you need to update the redirect URLs.
-
In the application settings, go to the General tab and click Edit.
-
In the Sign-in redirect URIs, add
https://<account-domain>/callback/oidc-loginandhttps://<account-domain>/callback/acl(replace<account-domain>with other addresses you have configured for port 8443) -
You should now have 4 addresses in total (two with port 8443 and two without port number specified).
-
You can add more addresses in Configure SAML settings > SAML Settings > show Advanced Settings > Other Requestable SSO URLs.
-
Save and test your changes.
PingId
OAuth 2.0 configuration
To migrate OAuth 2.0 PingId Single Sign-On to port 443, perform the following steps. For more details about PingId, see PingID Single Sign-On and Add a custom app in the Ping identity platform.
-
Log in to the PingID Admin Console as administrator.
-
In the main menu, click Applications.
-
Select the OAuth2 Worker that you need to update.
-
In the OAuth2 Worker settings, go to Redirect URIs.
-
Locate the URI that reference port 8443 and depending on your use case, either remove the 8443 port number from the existing URIs, or add new one as follows:
https://<account-domain>/callback/ping. -
Save your changes
SAML configuration
To migrate SAML PingId Single Sign-On to port 443, perform the following steps. For more details about PingId, see PingID Single Sign-On.
-
Log in to the PingID Admin Console as administrator.
-
In the main menu, click Applications.
-
Select the specific application for which you need to update the SAML SSO settings.
-
In the selected application, go to Configuration settings.
-
In the Assertion Consumer Service (ACS) URL, either remove the 8443 port or add a new record as follows:
https://<account-domain>/assertion/saml. -
Update Entity ID - change the SSO issuer ID optional parameter in Single sign-on authentication settings in your account to match this value if it is filled in.
-
Update any other relevant URLs (e.g., Single Logout URL) - if they include the port number, remove it.
-
Save your changes